Create a Managed File
info
Managed Files allows common documents to be centrally managed and added to individual forms or templates.
This feature is currently available in WA only.
Please note
Only principal users can create and edit Managed Files. All users can add an existing Managed File to their form.
Click
Managed Filesfrom the left-hand menu.Click
Createfrom the top-right corner of the screen.
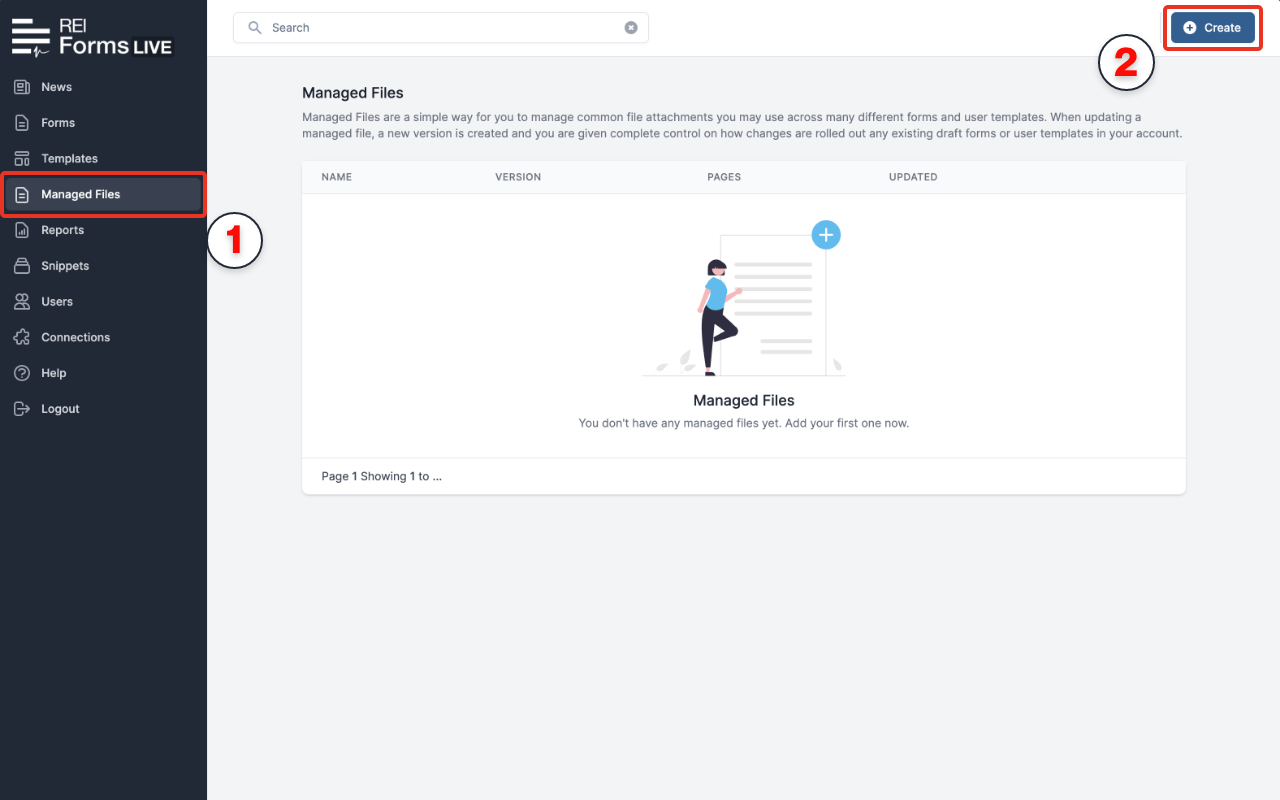
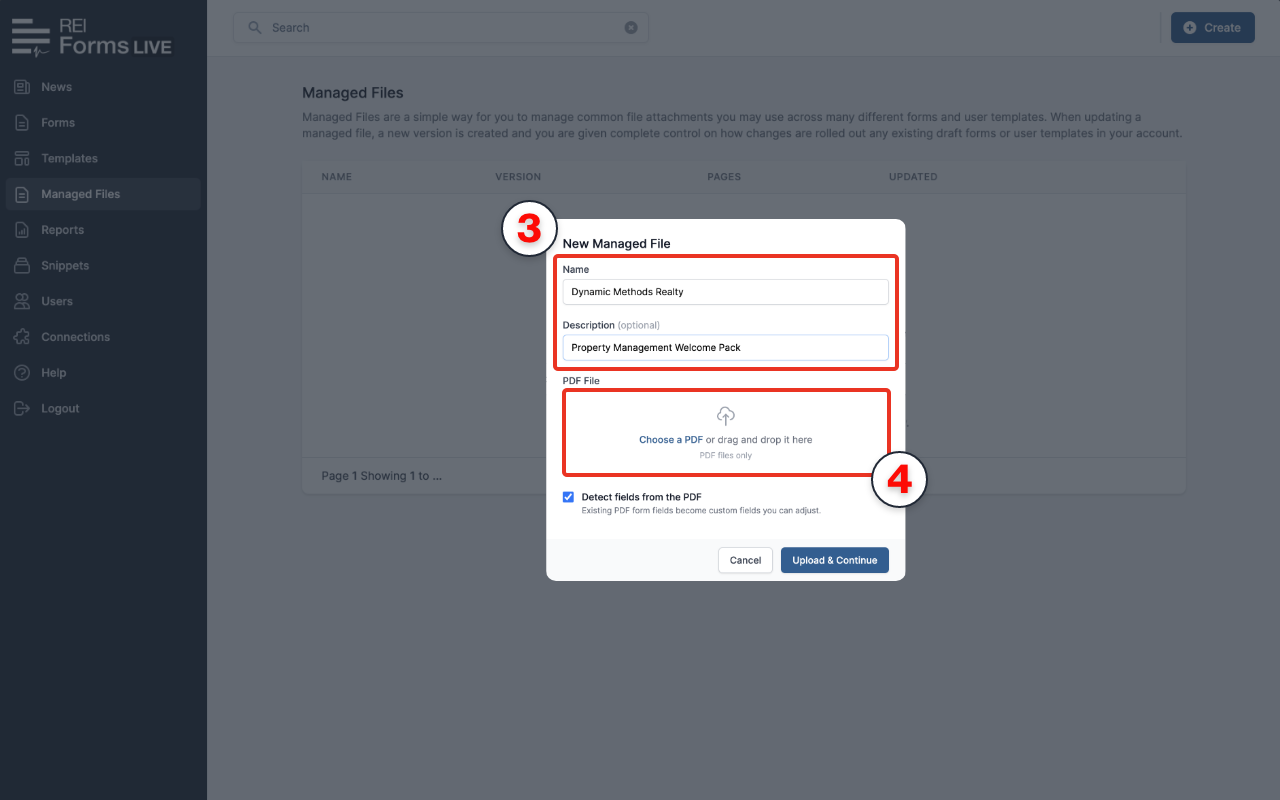
Enter a
nameanddescriptionfor the managed file.Click
Choose a pdfto select your file, or drag and drop it into thePDF Filebox.
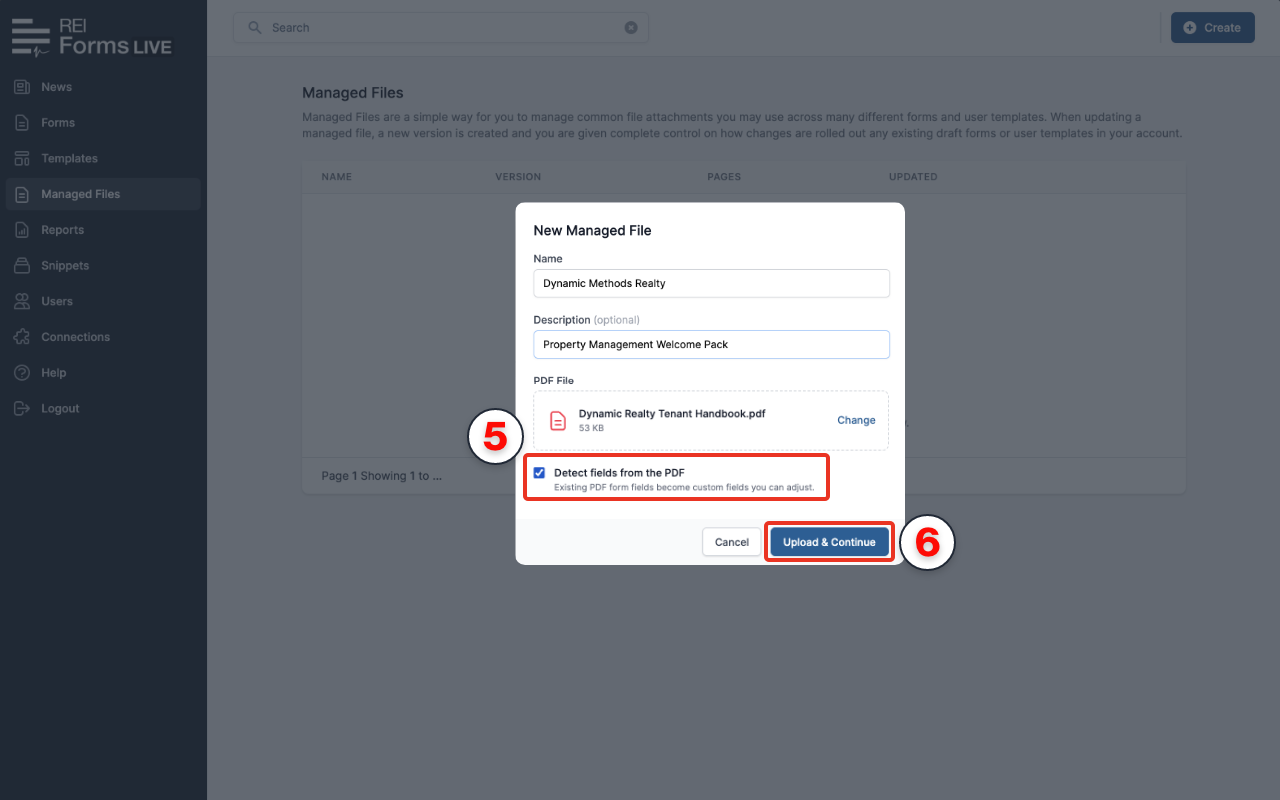
Click the
Detect fields from the PDFto detect existing form fields in the uploaded PDF.Click
Upload & Continue.
Please note
Only principal users can add or edit fields in the Managed File editor.
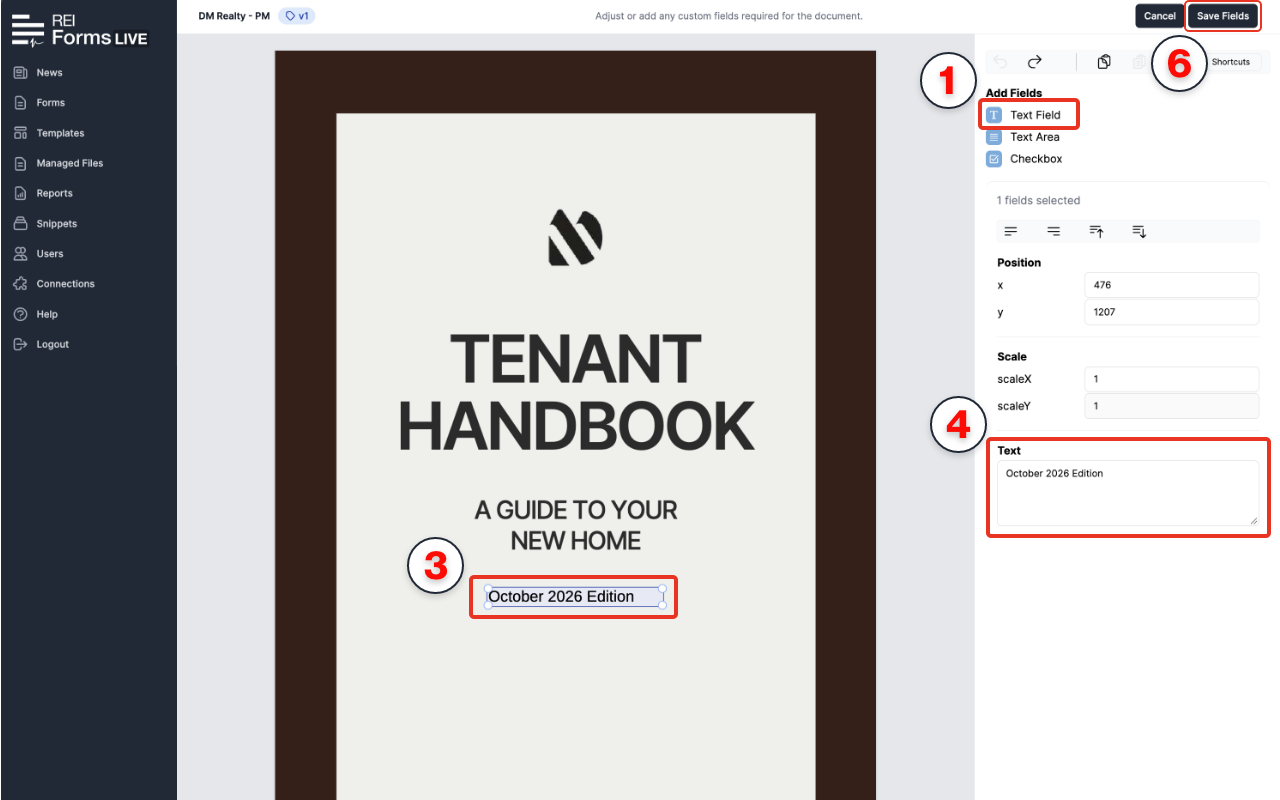
The PDF editor will open, with the field controls displayed in the sidebar to the right of the PDF.
Add Text Field#
Click
Text Fieldin the editor sidebar.Click where you want to place the text field on the PDF.
Drag the field into the required position.
Enter text you want to include in the
Text Valuedialog box at the bottom of the sidebar.Repeat these steps to add more text fields.
Click
Save Fieldsto to save your changes.
Add Text Area#
Click
Text Areain the editor sidebar.Click where you want to place the text area on the PDF.
Drag the text area into the required position.
Enter any text you want to include in the
Text Valuefield at the bottom of the sidebar.Repeat these steps to add more text areas.
Click
Save Fieldsto save your changes.
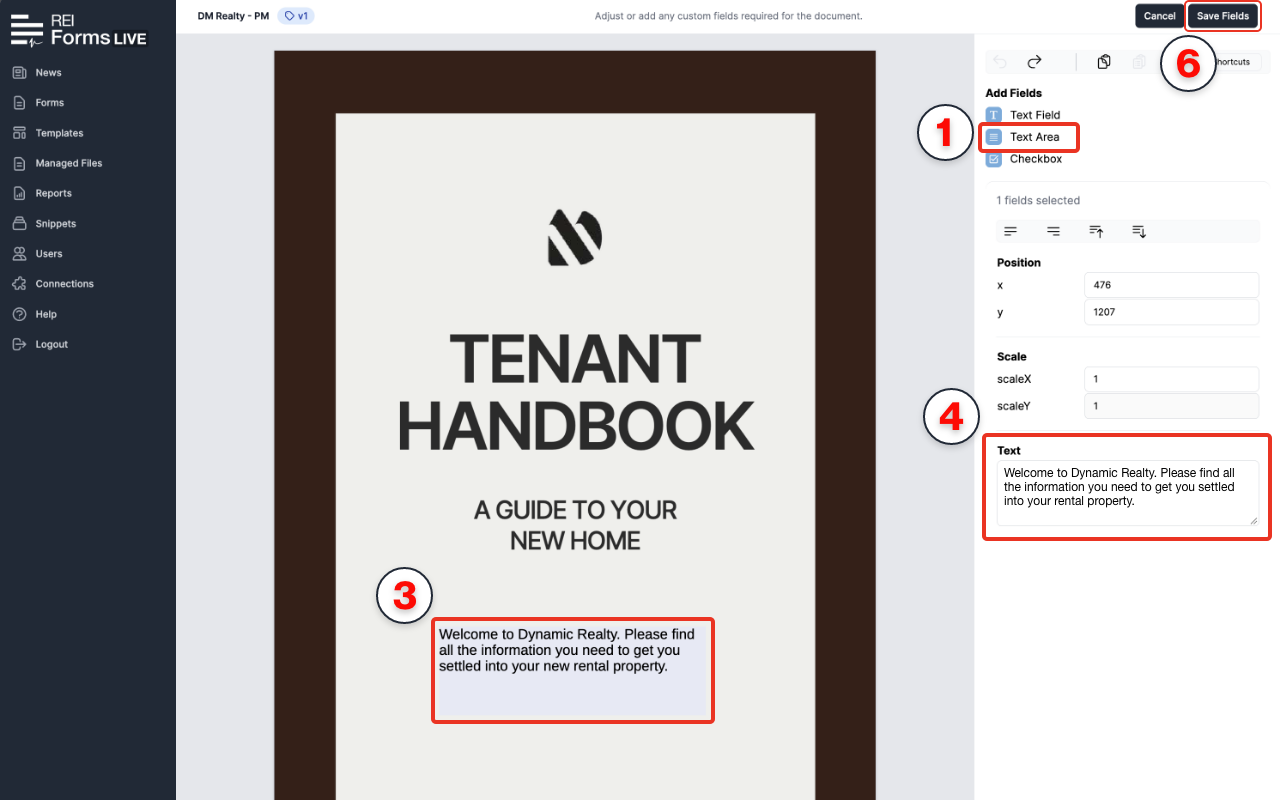
resizing textboxes
To resize the Text Field or Text Area, pull and drag the corners outwards, up or down, to your desired size. This is ONLY available for the Text Field and Text Area.
Add Checkboxes#
Click
Checkboxin the editor sidebar.Click where you want to place the checkbox on the PDF.
Drag the checkbox into the required position.
Repeat these steps to add more checkboxes.
Check the
Checkedcheckbox depending on your preference.Click
Save Fieldsto save your changes.
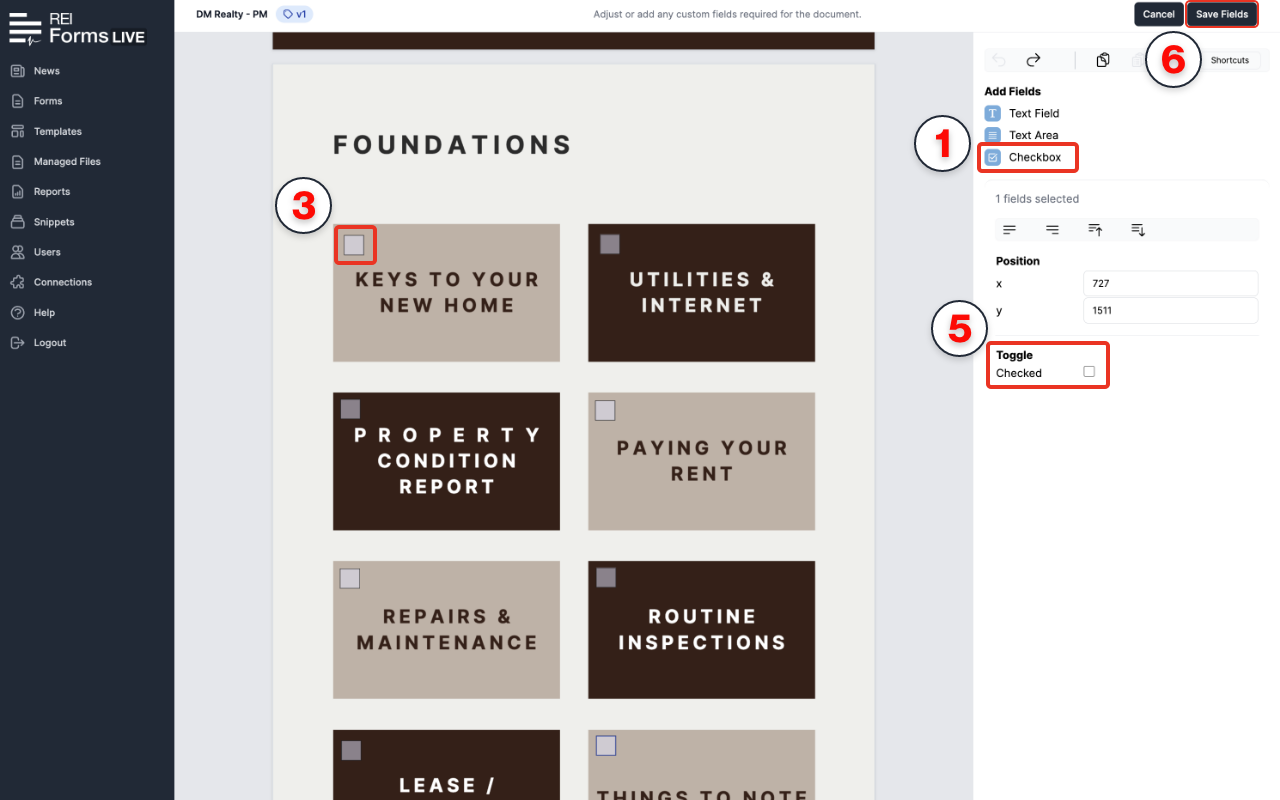
To add text beside a checkbox, follow the instructions in Add Text Fields and position the text field beside the checkbox.
Please note
Checkboxes cannot be resized.