Signing PDF Attachments
please note
The PDF edit feature is currently only available in ACT, NT, NSW and WA.
To activate the PDF attachment signing feature, you must first either purchase a Forms Live Sign subscription or connect to your DocuSign account first. Our examples below use Forms Live Sign.
getting started
These features can be used on external PDFs that have been attached to an REI Forms Live form. For information on how to upload an external PDF see Attaching Files.
Adding Signatures#
- Scroll down to the uploaded PDF and Hover to the top left corner of the page to reveal the
Edit Fieldsbutton.
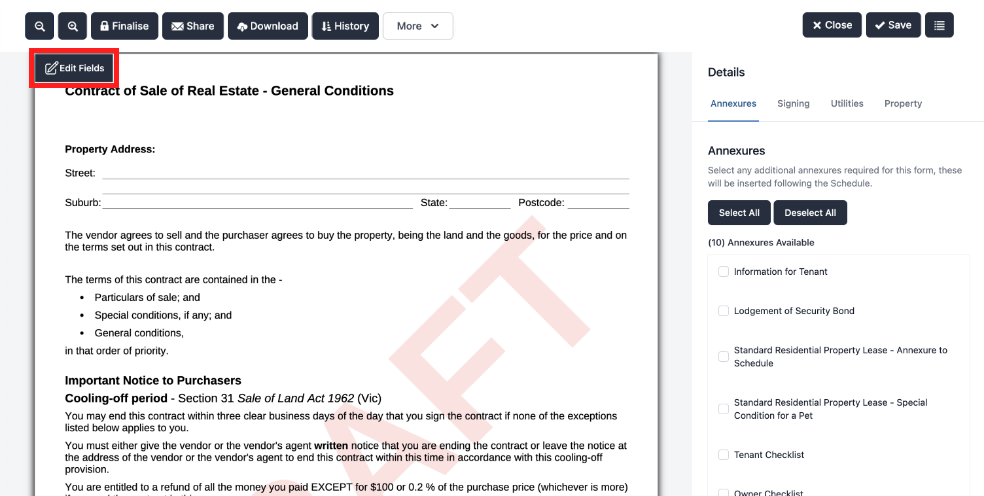
Fig. 1.0 - Hovering over the PDF document to reveal the Edit Fields button
- Click the
Edit Fieldsbutton at the top left of the page to activate the PDF editor.
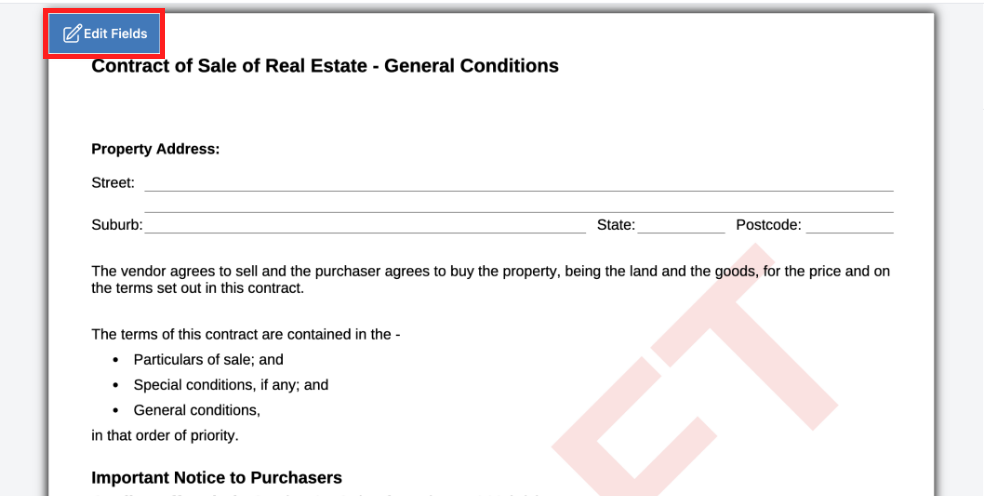
Fig. 1.1 - The Edit Fields button will activate the new sidebar
- The PDF editor will now appear in the
sidebarto the right of the PDF.
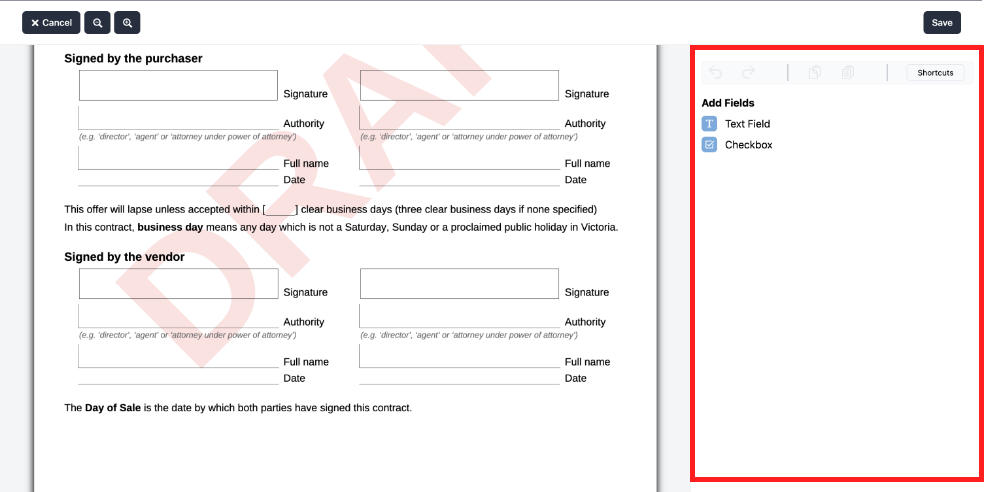
Fig. 1.2 - The Edit Fields sidebar
- Select the party you require a signature from to activate the
Signature Field.
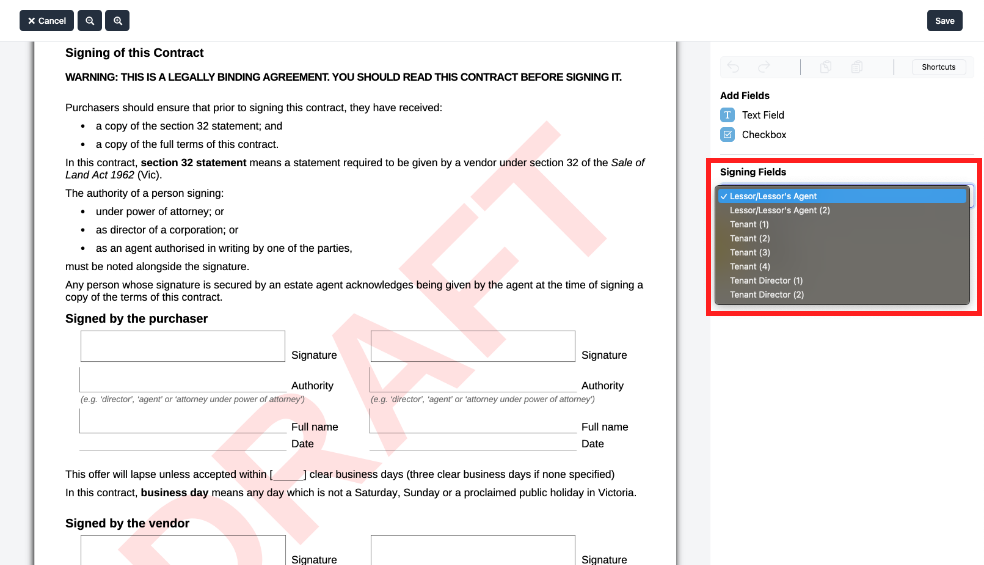
Fig. 1.3 - Adding a Text Field to the PDF
Click
Signaturefrom theSigning Fieldsmenu.Click anywhere on the PDF to drop the
Signature,NameandDatefields into the document.
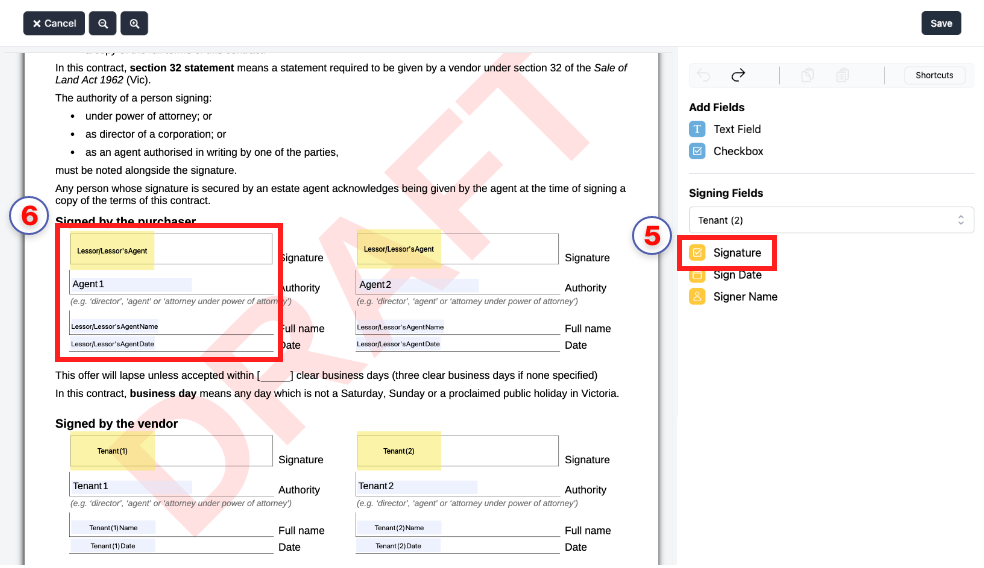
Fig. 1.4 - Adding individual Signature Fields to the document
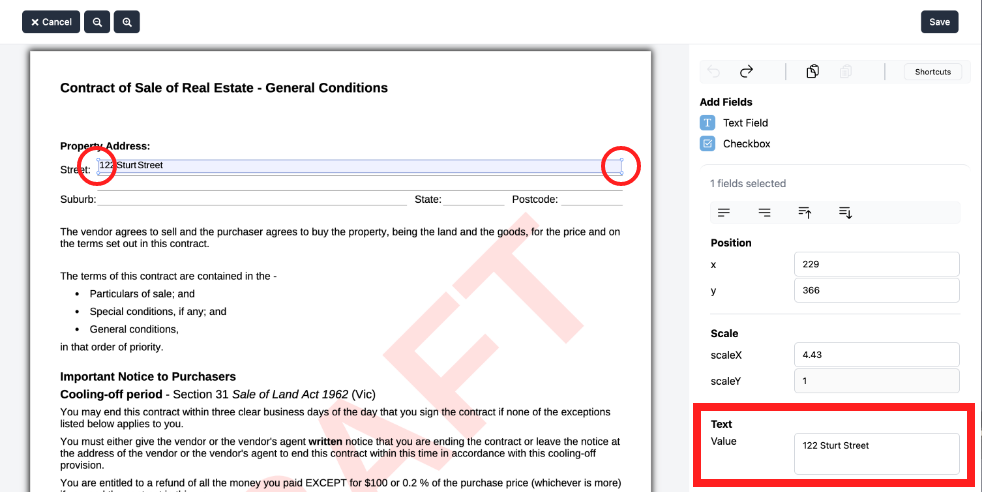
resizing Text fields
To resize the Text Field, pull and drag the corners outwards, up or down, to your desired size. This is ONLY available for the Text Field.
Edit Signature Fields#
To reposition
Signature Fields, Highlight theSignature,NameandDateto group the fields, then Drag & Drop the set ofSigning Fieldsinto the preferred position.To add individual
Signer Nameand/orSigner Datefields, Click on field name then Click anywhere on the PDF to drop the field into the document.
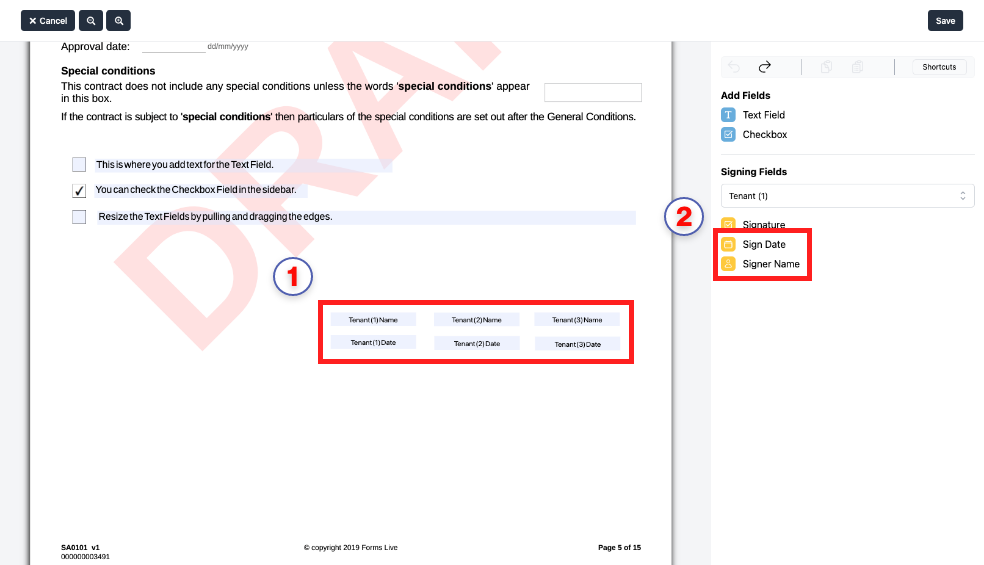
Fig. 2.0 - Repositioning and Selecting individual Signer Name and Sign Date Fields
- To Remove a
Signature, select all the theSigning Fields, followed by the delete key on your keyboard.
Mac Users
Mac users MUST use the fn + del keys to delete a text box field.
- Click
Saveto confirm signers and placement of fields.
Sending Signature Forms#
Click the
Finalisebutton at the top of the screen.Navigate to the sidebar and click the
Signingtab and scroll to theFilessection and ensure the PDF Attachment file is ticked.
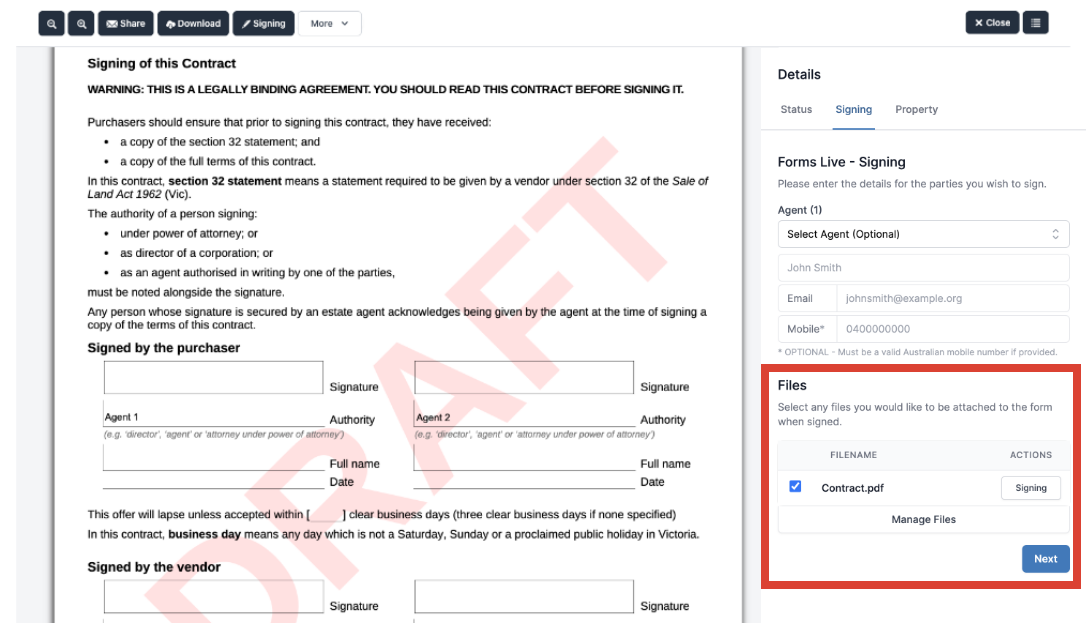
Fig. 3.0 - Check the box beside the PDF attachment you want to attach to the document
- Enter the name and email addresses for all the parties you wish to sign the PDF attachment, then click
Next.
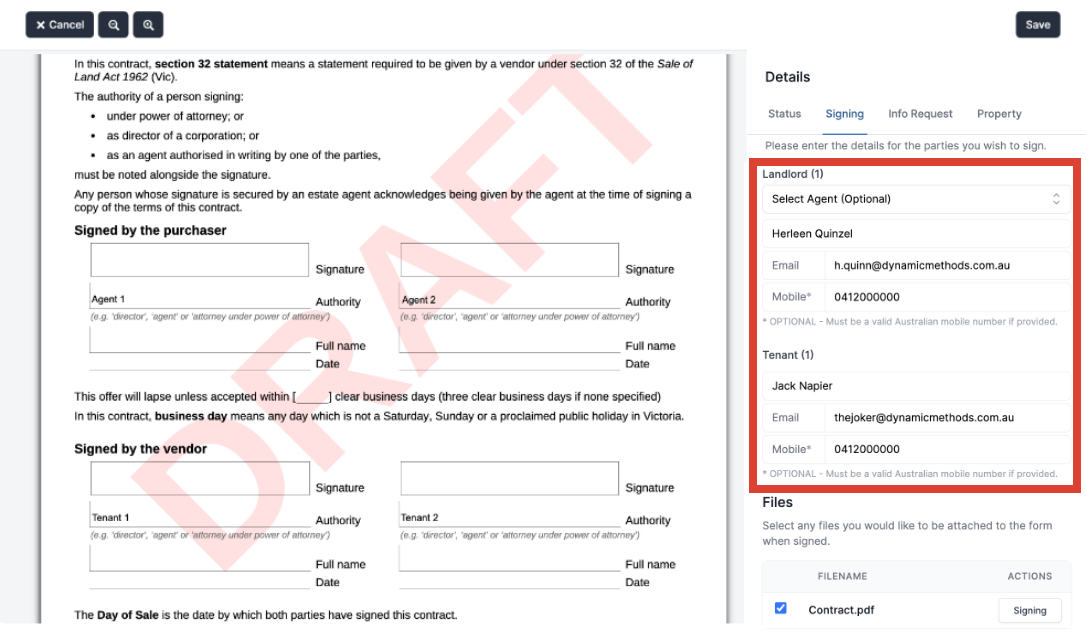
Fig. 3.1 - Enter the name and email address of signers
- Once sent, each signer will be prompted to sign the pdf via an Electronic Signing method.
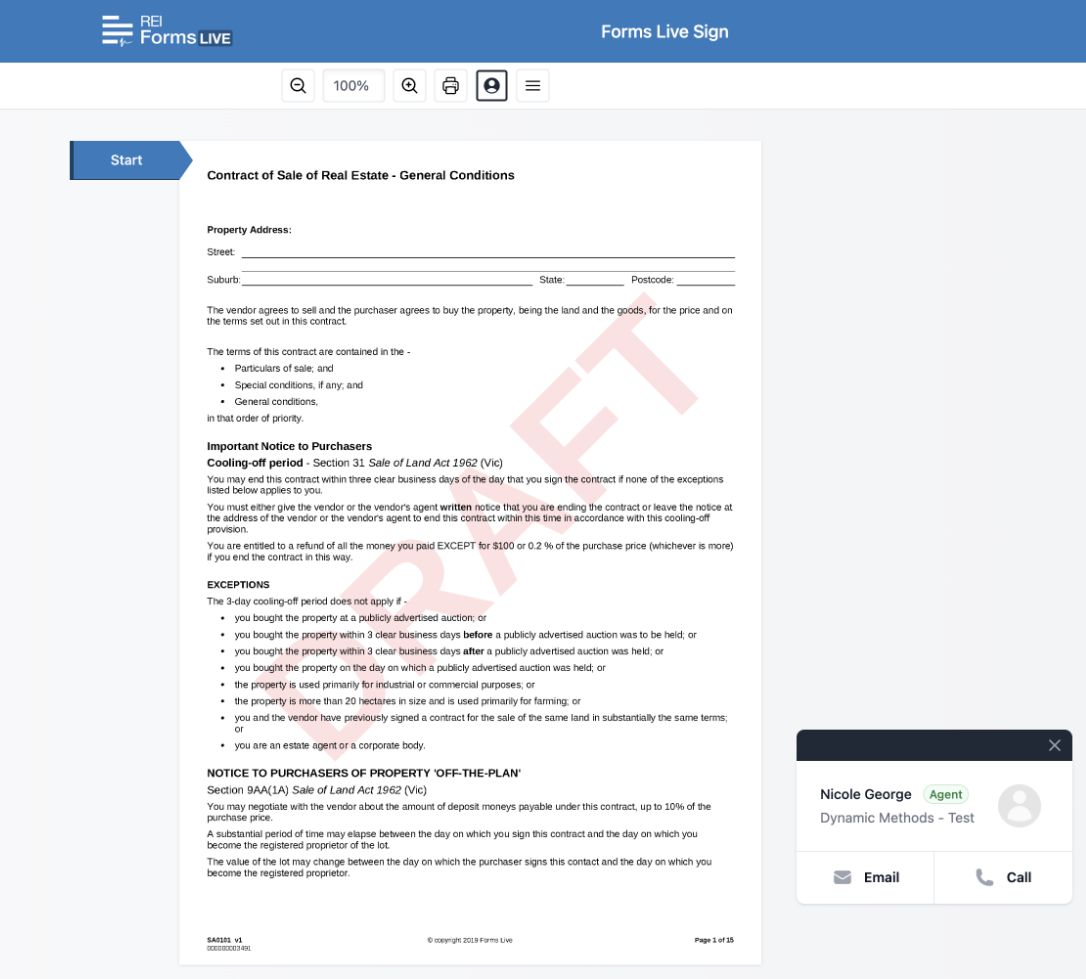
Fig. 3.2 - Signing the PDF attachment via DocuSign
Download Attachment#
Once the form and attachment have been signed, return to the Forms page and select the relevant form.
Click the
Downloadicon on the top of the page to open thePrint Optionspop-up.
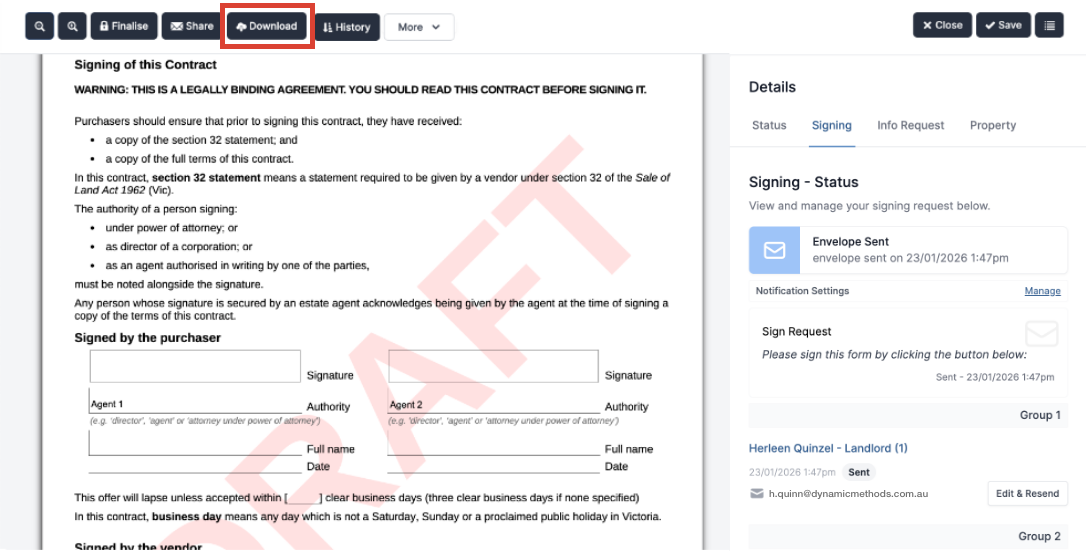
Fig. 4.0 - The Download button at the top of the page
- Tick the PDF for signing under the
Attach Filessection andSign Here tabsto select all the parties you need a signature from - then clickPrint.
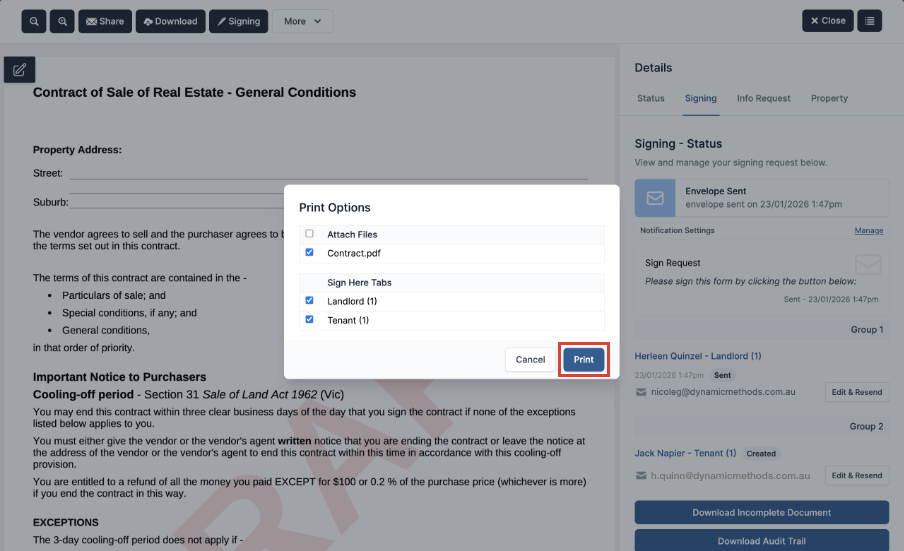
Fig. 4.1 - The Print Options pop-up to select files to download and signers